
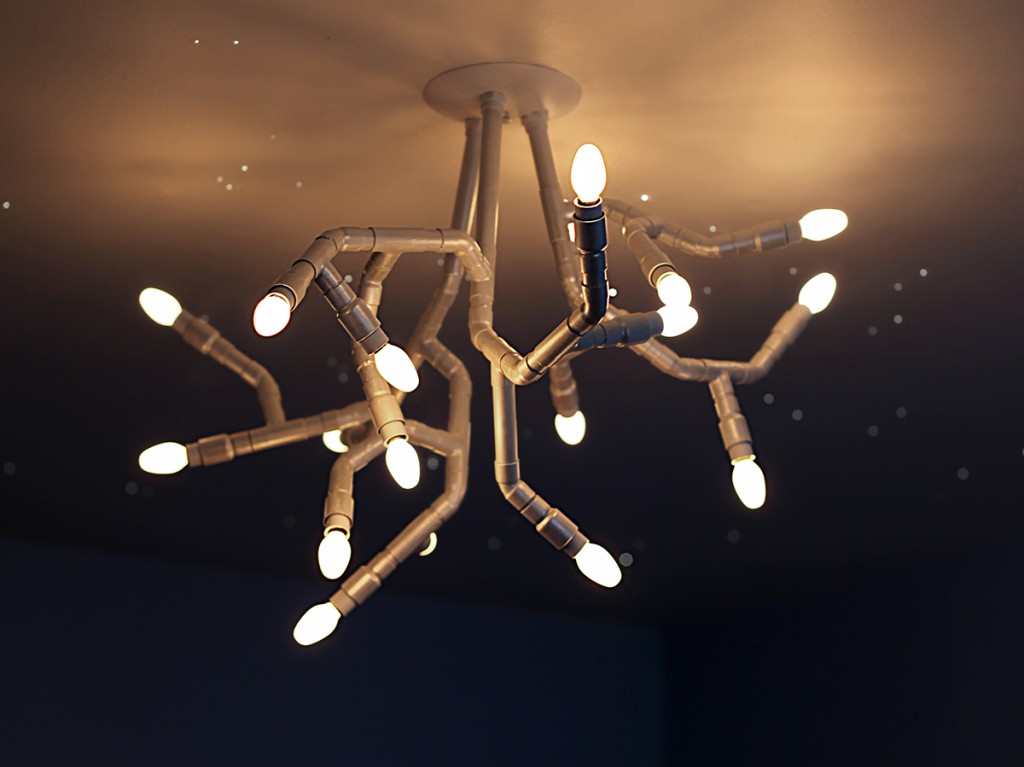


As a soon-to-be parent with time to spare, uh, yeah, I thought I’d take it upon myself to create a chandelier to complement our nursery’s fiber optic starfield ceiling. I have already had some experience with iron pipe fixtures but wanted something a little more delicate for this one. I called the resulting chandelier a pedicel chandelier because the small frosted night light bulbs I used along with the pearl white painted copper pipe reminded me of the small fuzzy horns that a male fawn grows before antlers, also known as pedicels (they’re not actually antlers).
The basic how-to for this chandelier is to use 1/2″ copper pipe to create an organic pipe structure with candelabra lights on the end of each pipe. Since you can use any low watt candelabra bulb, also known as E12 bulbs, a variety of different looks can be achieved using the same process. This projects requires knowledge of electrical wiring and should only be undertaken by those who are familiar with light fixture wiring and the dangers involved.
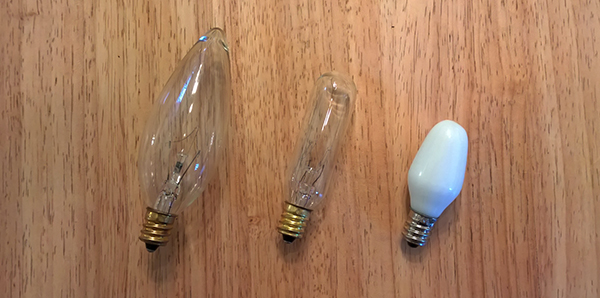
Three different candelabra or E12 light bulbs.
The copper pipe is attached to a dome fixture cover with threaded adapters and electrical bushing nuts (any appropriately sized nut would work). I soldered the pipe together after it was completely cut and assembled however there are issues with soldering which I’ll get to later. Use of epoxy to join the copper hardware would probably be much easier and safer.
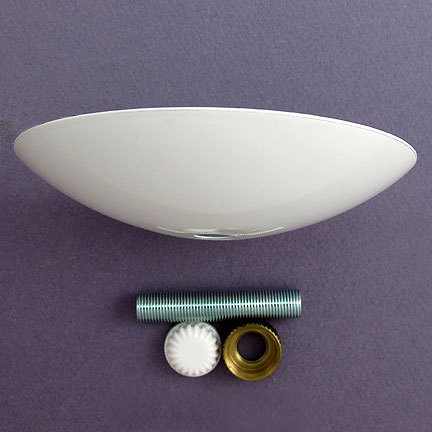
Metal dome fixture cover. These are also available in brass if you’re planning on leaving the copper pipe unpainted.
Below you can see the basic collection of fittings for the chandelier’s horns. Once wired the candelabra socket connections are wrapped in electrical tape to insulate them from each other as well as from the pipe itself, make sure all wires are neatly trimmed and covered in tape. The electrical tape also enables the socket to fit snugly (is there an uglier word with a more desirable meaning?) in the pipes. Not snug enough? Add more tape. Too snug? Take some off. The only coupling I had left to photograph was one that I had done some test painting on, rest assured when you purchase them they are copper coloured.
Though I purchased a whole bunch of 90°/right angle fittings I did not end up using them as 45° fittings convey a much more organic feel. Even though the T junction fittings were at right angles I tried to use a 45° fitting right after to soften the look of the structure. Another tip to help the fixture look organic is to never have two lights extending at the same angle — all angles should be at least slightly different. If you want your fixture to have a more industrial or steampunk feel, more right angle fittings may work better.
I decided on 3 separate structures, or horns with 6 lights each. The total 18 7W bulbs ends up at a scant 126W, perfectly acceptable for most dimmers. This meant 5 T junctions per arm, a total of 15. I suggest mapping out your fixture before heading to the hardware store and try to purchase fittings which don’t have price tags on them, I made this mistake and spent a cozy evening with Goo Gone because of it.
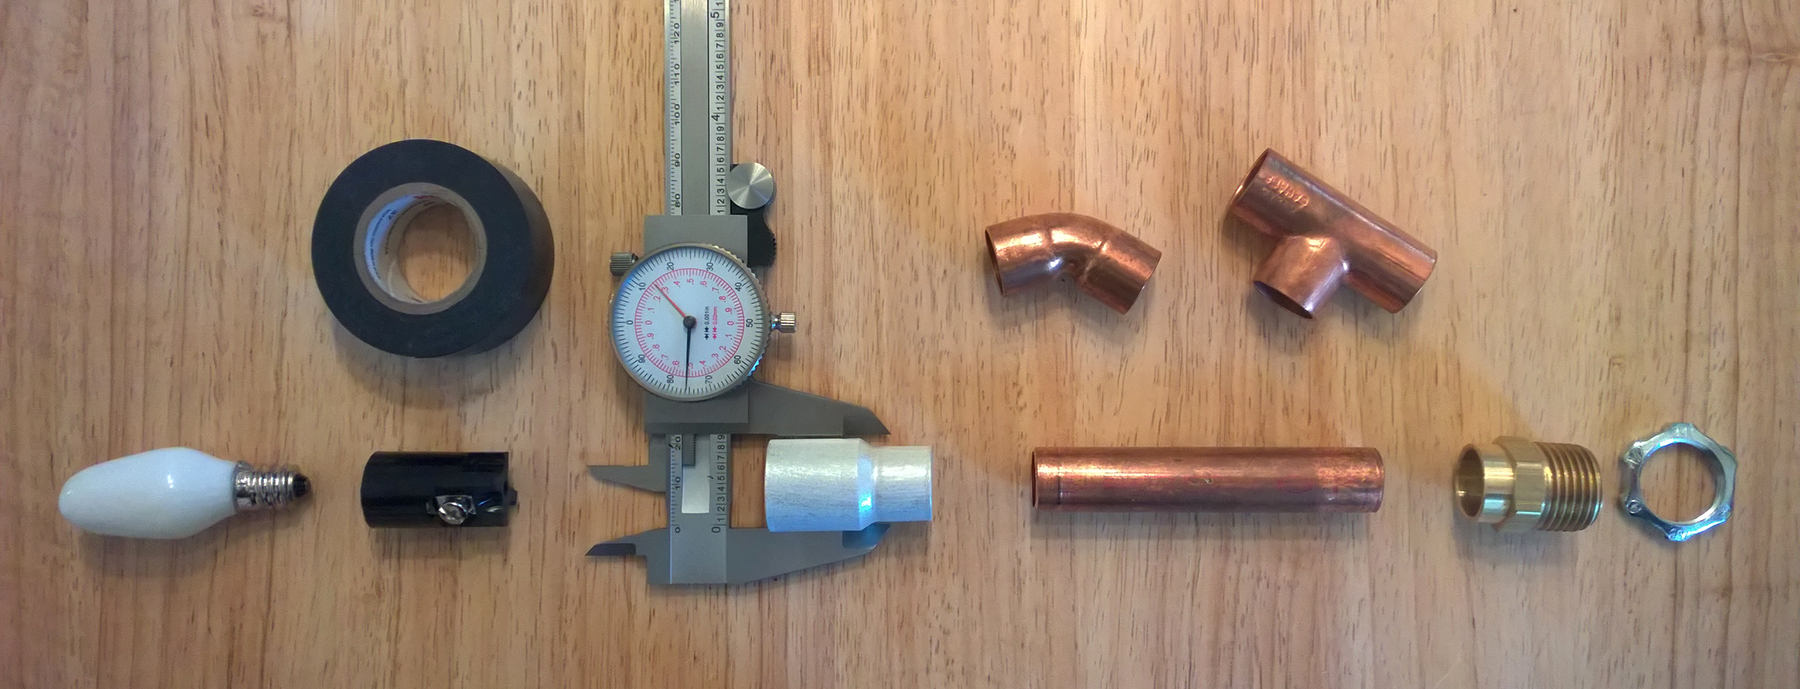
Left to right, candelabra (E12) 7W night light bulb, candelabra (E12) socket, electrical tape, 3/4″ to 1/2″ copper coupling, 1/2″ copper pipe and fittings, 1/2″ to 3/4″ threaded brass adapter, 1/2″ electrical bushing nut.
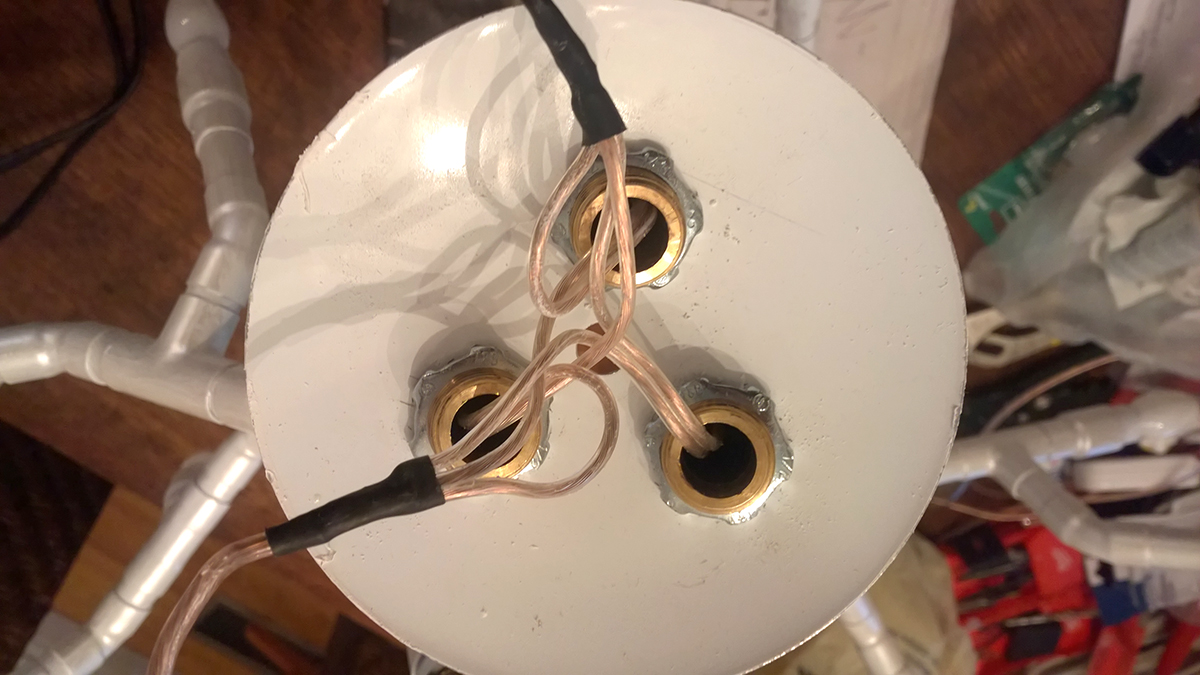
Here you can see the threaded brass adapters and electrical bushing nuts securing the fixture horns to the metal dome fixture plate. Be sure to get brass threaded adapters and not copper, copper threads are too soft to tighten properly and will bind.
Drilling the mounting holes is a breeze, as long as you have a power drill and a stepped bit (pictured below). Stepped bits can be expensive, but they’re
well worth it as they make quick work of drilling holes in thin metals, holes which could otherwise prove tricky and end up messy. I highly recommend investing in one, or a set.
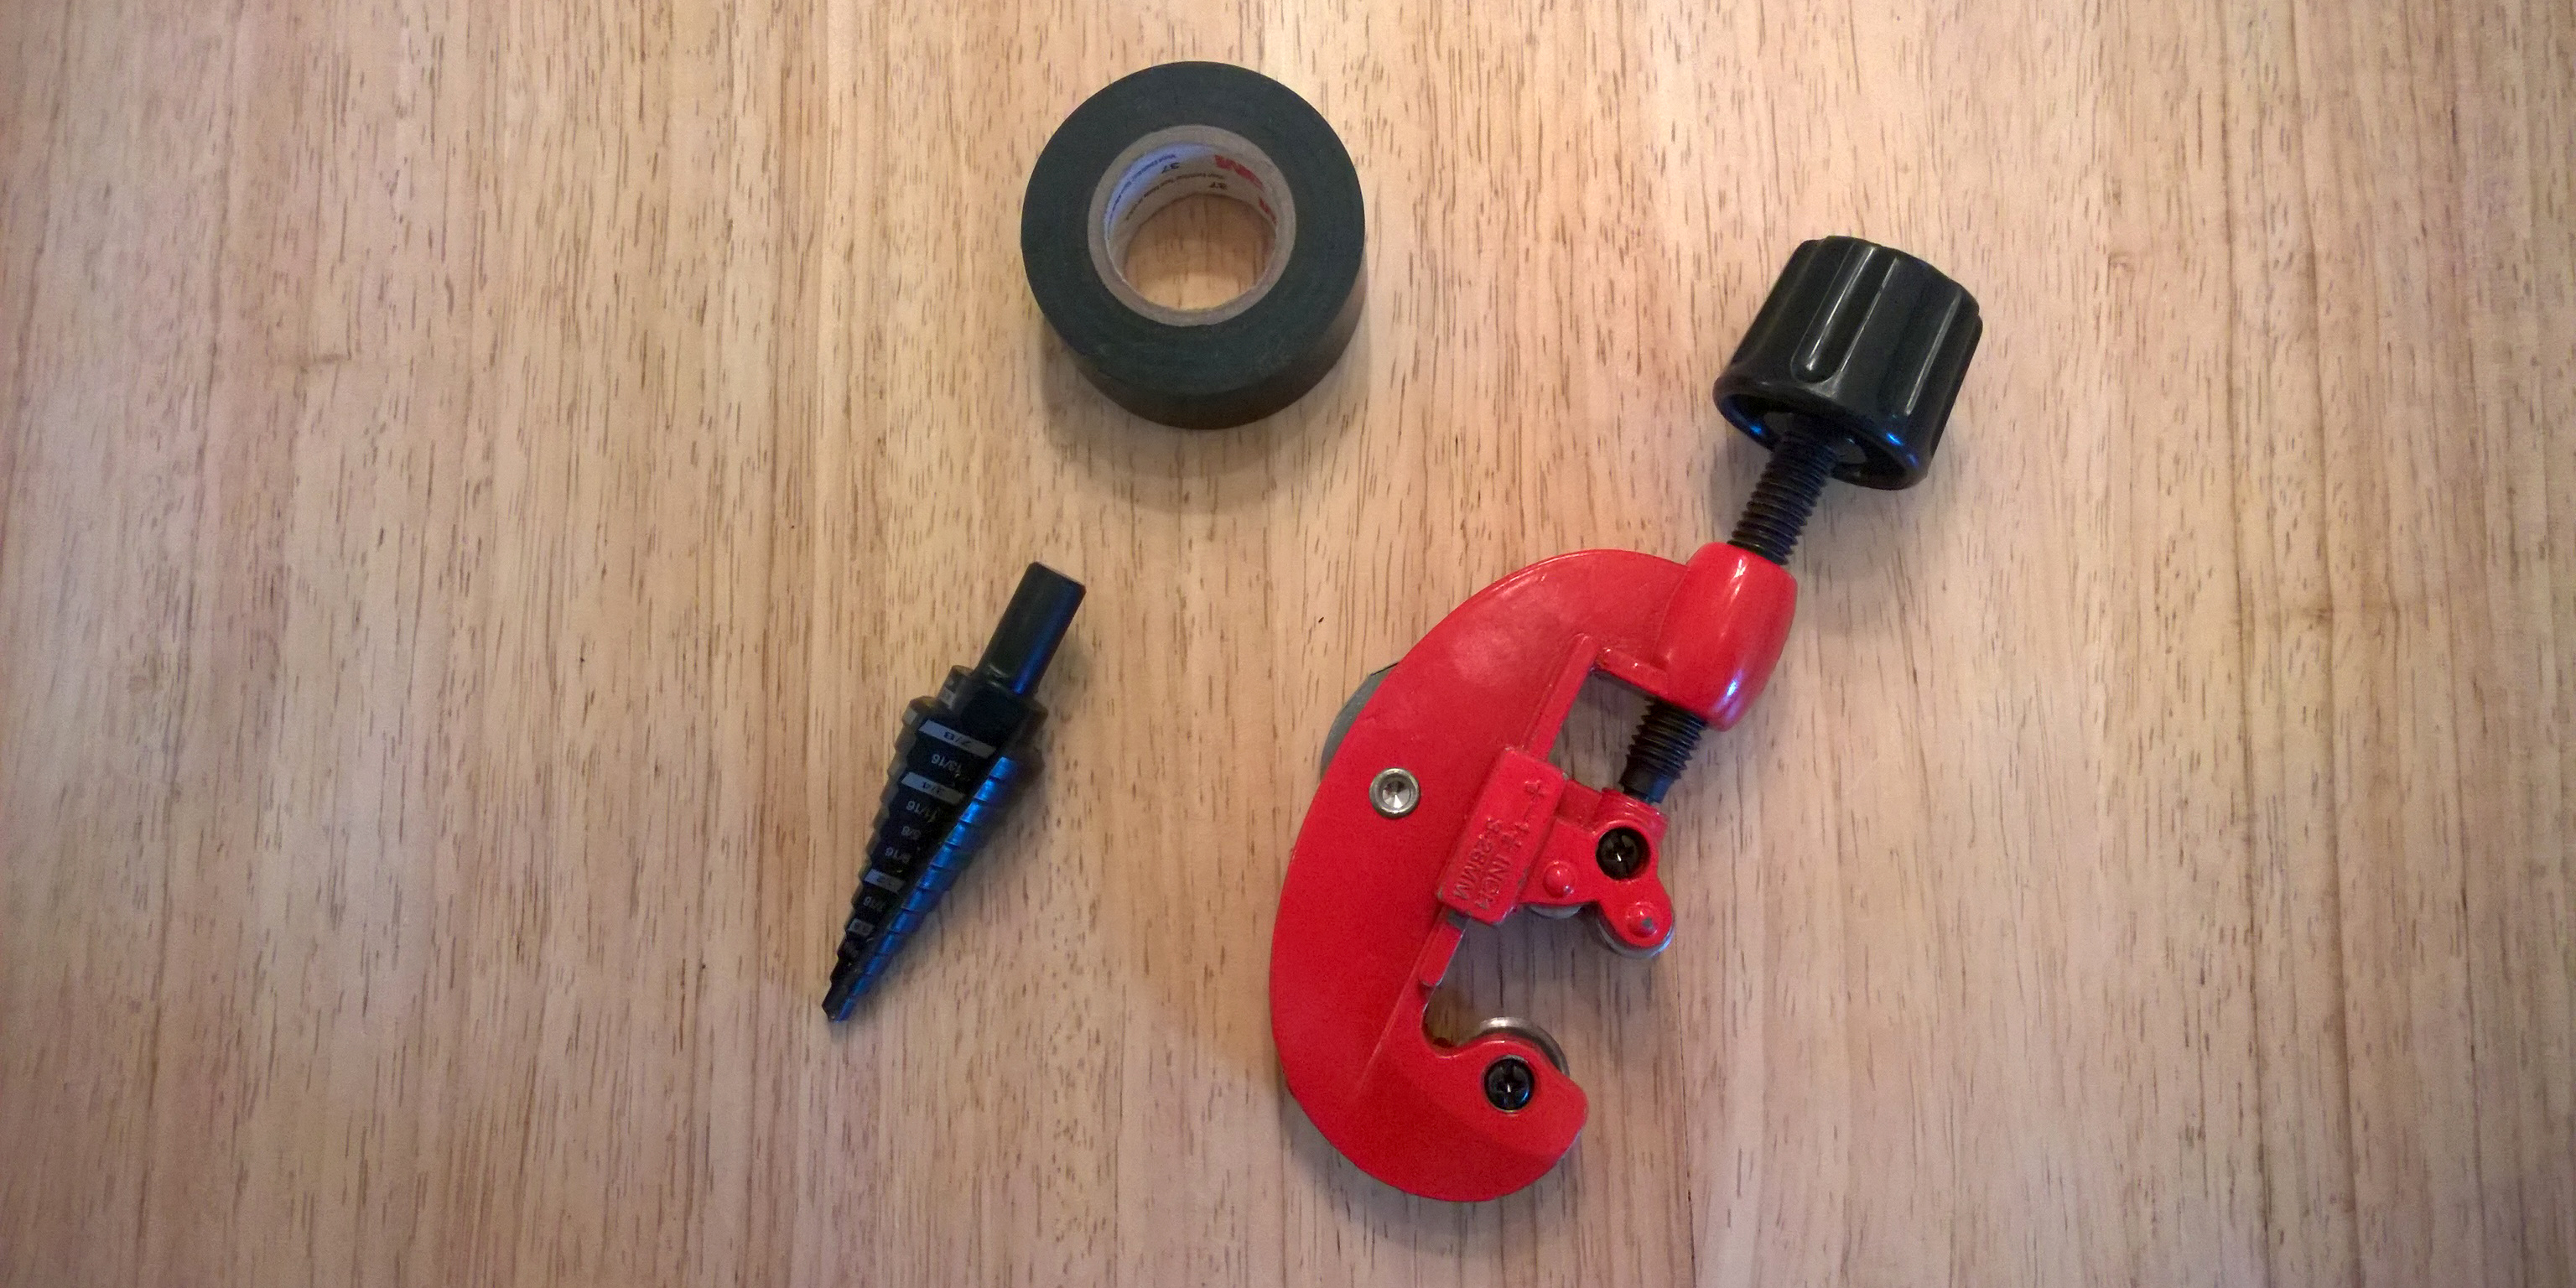
A few required tools, a stepped drill bit (for drilling the mounting holes in the fixture plate), a copper pipe cutting tool and a roll of electrical tape.
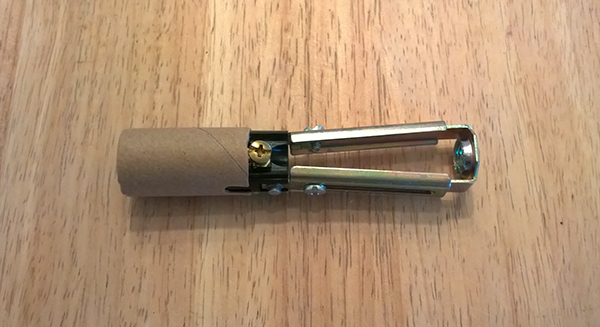
Candelabra (E12) replacement socket.
We don’t need all that extra jazz, just the socket. Some of these are riveted together, others have a screw. In the case of rivets, unscrew the extension, then just bend the remaining metal mounting arms until the rivet brakes — careful not to crack the bakelite socket (I don’t even know if it’s bakelite, but that’s what I like to think it is).

Candelabra socket disassembled. We only need the socket itself, shown on the right.
I started by drilling the fixture plate and mounting the threaded couplings, this gives you a good base to create your chandelier upon. I used a bolt through the center hole of the plate to attached the fixture securely to a camera tripod while I worked on it. Things can fall apart quite easily if you’re not paying attention or one structure is heavier than another, you can use some twine, elastics, or whatever works really to support various pieces while you create.
If it becomes a pain to keep it together while you work than you can affix joints that you are confident will not change. I ended up soldering the main support pipe line of each of the three horns and I kept any extending pipe structures separate to make threading the wiring easier. If you’re soldering you want to do as much soldering as possible before starting any wiring — soldering with wire inside can melt the insulation and short out the entire chandelier, this is one of the soldering issues I mentioned earlier.
Once everything is cut, perhaps some has been soldered or epoxied, it’s time to start running wire. I decided to run three main wiring lines, one for each horn, any pipes extending off the main horn would then be spliced into the main line. Based on the bulbs you want to use, and how many, you’ll have to determine the max amperage and thus the proper gauge of wire to use, if you’re soldering you’ll want to get wire with as much insulation as possible.
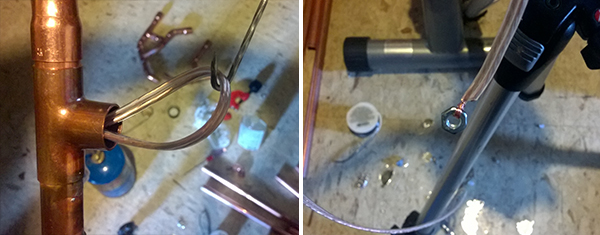
A bent nail (left) is great for fishing a wire line out of a T junction. By attaching a nut to the end of a wire (right) you can use a magnet to guide the wire through complex structures.
When running wire ensure that you leave at least 2-3 inches extending out of each pipe and when splicing be sure to maintain the proper polarity — striped or two different coloured wires helps with this. Once wired it’s time to epoxy or solder any final joints, if you’re soldering you run the risk of melting the wiring insulation, to avoid this remember that these joints do not have to be waterproof, just a small amount of solder will hold the joint. Be sure to use flux and have a spray bottle with water ready, quickly get the pipe up to heat, apply the solder and as soon as it’s solidified use the spray bottle to cool down the pipe to help prevent any damage to the internal wiring.
Once you’re done soldering you can test the wiring for faults with a multimeter, check for faults between the two polarity wires and from each wire to the chandelier structure. If there are any faults you’ll have to open things back up, you can re-flow solder to separate parts, not sure what you’d do if you used epoxy and then found a fault :O
To attach the sockets simply strip and screw the wire to each pole on the socket and then wrap them in electrical tape. While not essential, it’s good practice to maintain the same polarity across all sockets, to do this keep track of which wire you’re attaching to the brass pole and which to the silver pole on each socket. Once wrapped in electrical tape you can push them into the pipe ends.
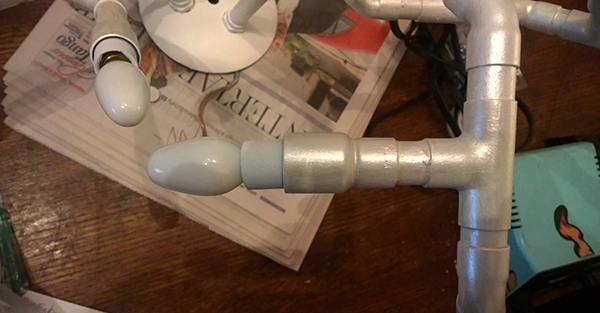
Bulb socket and pipe fitting after white rustoleum and pearlescent acrylic.
Once you’ve got all the sockets affixed you should test for faults again with your multimeter. If no faults are found between the wires or to the structure you can test the fixture by attaching a 120 volt wall plug to the end and giving it a go. If all goes well you can move onto finishing.
I thought, while great looking and oozing steampunk, that the bare copper was a little too hardcore for my infant son’s nursery so I decided to paint the fixture white and use a pearlescent acrylic on the pipes. The sky’s the limit here, but copper is expensive so, if you can, show it off! If you do paint be sure to stuff some paper towel or toilet paper into each of the sockets so that the bulb leads don’t get paint on them.
Once it’s dried you can test it again with the multimeter (can’t be too careful) and then hang it. I ended up using a dimmer with a remote on this fixture so that my wife and I could adjust the lights while minding to the baby and it works like a charm. Good luck! I’m happy to answer any questions in the comments.


Recent Comments